UI attribute validation with Nightwatch
Recently, I faced a challenge in one of my project, wherein there were 3 different designs and we had to test these designs on different screen resolutions and browsers.
Doing this activity manually is quite tedious, when it comes to matching each element attributes on different browsers, resolutions and so on..
So thought of creating something exciting and useful which can be used prior to the actual development of a website.
How did I solve the above problem?
So, I have created nightwatch-ui-attributes-validator package which solves the problem of validating the element attributes of any web application. It compares actual attributes of the website against the baselines (expected) attributes provided by the user and highlights the deviations. As a result, it increases the visual coverage of any application. This blog shall focus on how to use the package, in your nightwatch project.
- Step 1: Create a folder, initialise the project and install
nightwatch
mkdir nightwatch-UI-tests
cd nightwatch-UI-tests
npm init
npm install nightwatch --save- Step 2: Install
nightwatch-UI-attributes-validatorusing below command
npm install nightwatch-ui-attributes-validator --save- Step 3: Define your baseline (expected UI attributes) in the below format.
const sideBarElements = {
  desktop: [
    {
      "tag": "h3",
      "selector": "//h3[@class='mt-2 author-bio']",
      "text": "Dikshita Shirodkar",
      "attributes": {
        "font-family": "Raleway",
        "font-weight": 700,
        "color": "rgba(0, 0, 0, 0.8)",
        "font-size": "38.4px",
        "line-height": "42.24px",
        "letter-spacing": "normal",
        "text-align": "left",
        "display": "block"
      }
    }
  ],
  mobile: [
    {
      "tag": "h4",
      "selector": "//h4[@class='mr-4 mt-4']",
      "text": "Dikshita Shirodkar",
      "attributes": {
        "font-family": "Raleway",
        "font-weight": 700,
        "color": "rgba(0, 0, 0, 0.8)",
        "font-size": "16px",
        "line-height": "17.6px",
        "letter-spacing": "normal",
        "text-align": "left",
        "display": "block"
      }
    }
  ]
};

module.exports = { sideBarElements };
Explanation around the above baseline file:
We have 2 environments, where we need to run our UI tests:
- Desktop (1920 screen resolutions)
- Mobile (414 screen resolution)
However we can have multiple environment, depending on the need. Respective UI attributes for each element should be defined in the format as defined. These are HTML element attributes and can vary depending on the design for respective resolutions (environments)
- The baseline file can be supports
jsorjsonformat - We can have multiple baseline files, and should be place under baseline directory (mine are under
baselinefolder)
That’s pretty cool, we have defined our baselines or in simple words our expected outputs.
Step 4: Let’s create, nightwatch.conf.js, where you specify test_settings required in the project, along with some custom configurations required for this package
const chrome = require('selenium-webdriver/chrome');
const capabilities = new chrome.Options();
capabilities.addArguments('--ignore-certificate-errors');
capabilities.headless();

module.exports = {
  custom_commands_path : "./node_modules/nightwatch-ui-attributes-validator/commands",
  custom_assertions_path : "./node_modules/nightwatch-ui-attributes-validator/assertions",
  skip_testcases_on_fail: false,
  disable_error_log: true,

  screenshots: {
    enabled: false,
    path: 'screens',
    on_failure: true
  },

  test_workers: {
    enabled: true,
  },

  globals: {
    baselineDirPath : "./baselines",
  },

  test_settings: {
    desktop: {
      log_path: false,
      capabilities,
      src_folders: ["./desktopTests"],
      window_size: {width: 1920, height:1080},
      output_folder: 'reports/desktop_reports',
      webdriver: {
        start_process: true,
        port: 4444,
        server_path: require('chromedriver').path,
      },
      desiredCapabilities: {
        browserName : 'chrome',
        chromeOptions: {
          cli_args: []
        }
      },
    },
    mobile: {
      capabilities,
      window_size: {width: 414, height:896},
      output_folder: 'reports/mobile_reports',
      src_folders: ["./mobileTests"],
      webdriver: {
        start_process: true,
        server_path: require('chromedriver').path,
      },
      desiredCapabilities: {
        browserName: 'chrome',
        chromeOptions: {
          cli_args: []
        }
      },
    },
  }
};
Explanation around nightwatch.conf.js:
- This tells nightwatch to include the commands require for validation
custom_commands_path: ['./node_modules/nightwatch-ui-atrributes-validator/commands']- This tells nightwatch to include the assertions require for asserting the elements attributes`
custom_assertions_path: ['./node_modules/nightwatch-ui-atrributes-validator/assertions']- Remember, we stored all our baseline files under
baselinedirectory, here we specified the directory name. (This is required to be mentioned)
globals: { baselineDirPath : "./baseline" }Note: We have defined test settings for desktop, mobile and respectively defined their UI attributes within baseline. Like mentioned, you can add as many test environments, as required.
How do we add the UI validation within your tests?
Note: It is always better to manage your tests for different platforms in seperate folders.
- Step 1: Create src folder with name
desktopTestsand add your UI tests for desktop under this folder. One such example of UI tests is the below file
const { sideBarElements } = require('../baselines/homepageElement');

describe('Verify the UI attributes of the side bar component on both desktop and mobile', function() {
  it('Validate the side base for desktop screen', function(browser) {
    browser
    .url('https://dikshitashirodkar.com/')
    .assert.titleMatches('Home | QA Talking point')
    .assert.validateBaseline(sideBarElements.desktop)
    .end();
  });
});
Explanation of the above UI tests
assert.validateBaselineis the command used for validation the UI attributes.- It accepts parameter having name of the object having the UI attributes to be passed.
How do we run it?
In order run the UI tests, we simply use the below command:
- For desktop tests:
npx nightwatch --env desktop --reporter=html
nightwatch-UI-tests npx nightwatch --env desktop --reporter=html

> nightwatch-UI-tests@1.0.0 test-desktop /Users/dikshitashirodkar/Work/nightwatch-UI-tests
> npx nightwatch --env desktop --reporter=html

[Verify the UI attributes of the side bar component on both desktop and mobile] Test Suite
───────────────────────────────────────────────────────────────────────────────
ℹ Connected to ChromeDriver on port undefined (942ms).
  Using: chrome (106.0.5249.61) on MAC OS X.

  Running Validate the side base for desktop screen:
───────────────────────────────────────────────────────────────────────────────
  ℹ Loaded url https://dikshitashirodkar.com/ in 6945ms
  ✔ Testing if the page title matches 'Home | QA Talking point' (34ms)
  ✔ Testing if element 'Dikshita Shirodkar' attributes are matching
  ✔ Passed [equal]: Matching font-family to be Raleway
  ✔ Passed [equal]: Matching font-weight to be 700
  ✔ Passed [equal]: Matching color to be rgba(0, 0, 0, 0.8)
  ✔ Passed [equal]: Matching font-size to be 38.4px
  ✔ Passed [equal]: Matching line-height to be 42.24px
  ✔ Passed [equal]: Matching letter-spacing to be normal
  ✔ Passed [equal]: Matching text-align to be left
  ✔ Passed [equal]: Matching display to be block

  ✔ Testing if the baseline attributes are matching the actual page attributes

OK. 11 assertions passed. (7.12s)
Wrote HTML report file to: /Users/dikshitashirodkar/Work/nightwatch-UI-tests/reports/desktop_reports/nightwatch-html-report/index.html- For mobile tests:
npx nightwatch --env mobile --reporter=html
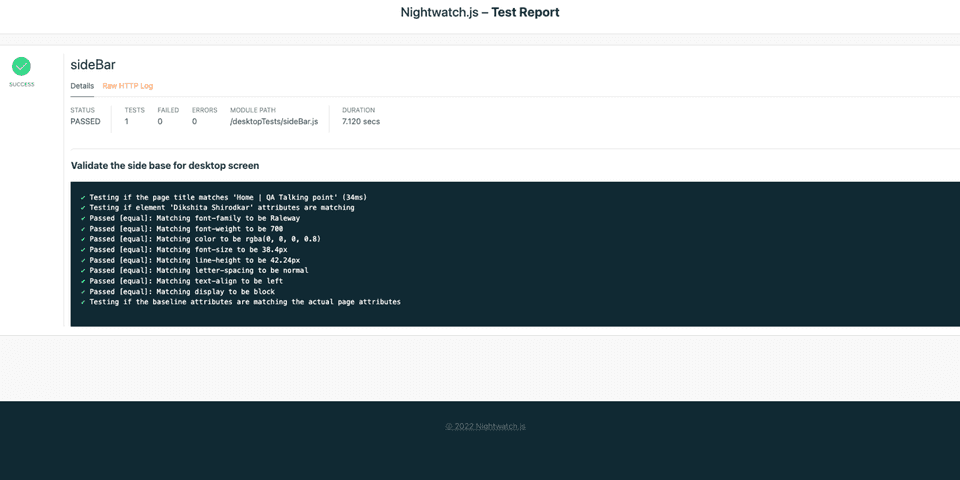
Reporting
Reports would be generated in respective folder defined in the config file, seperately for both desktop and mobile
